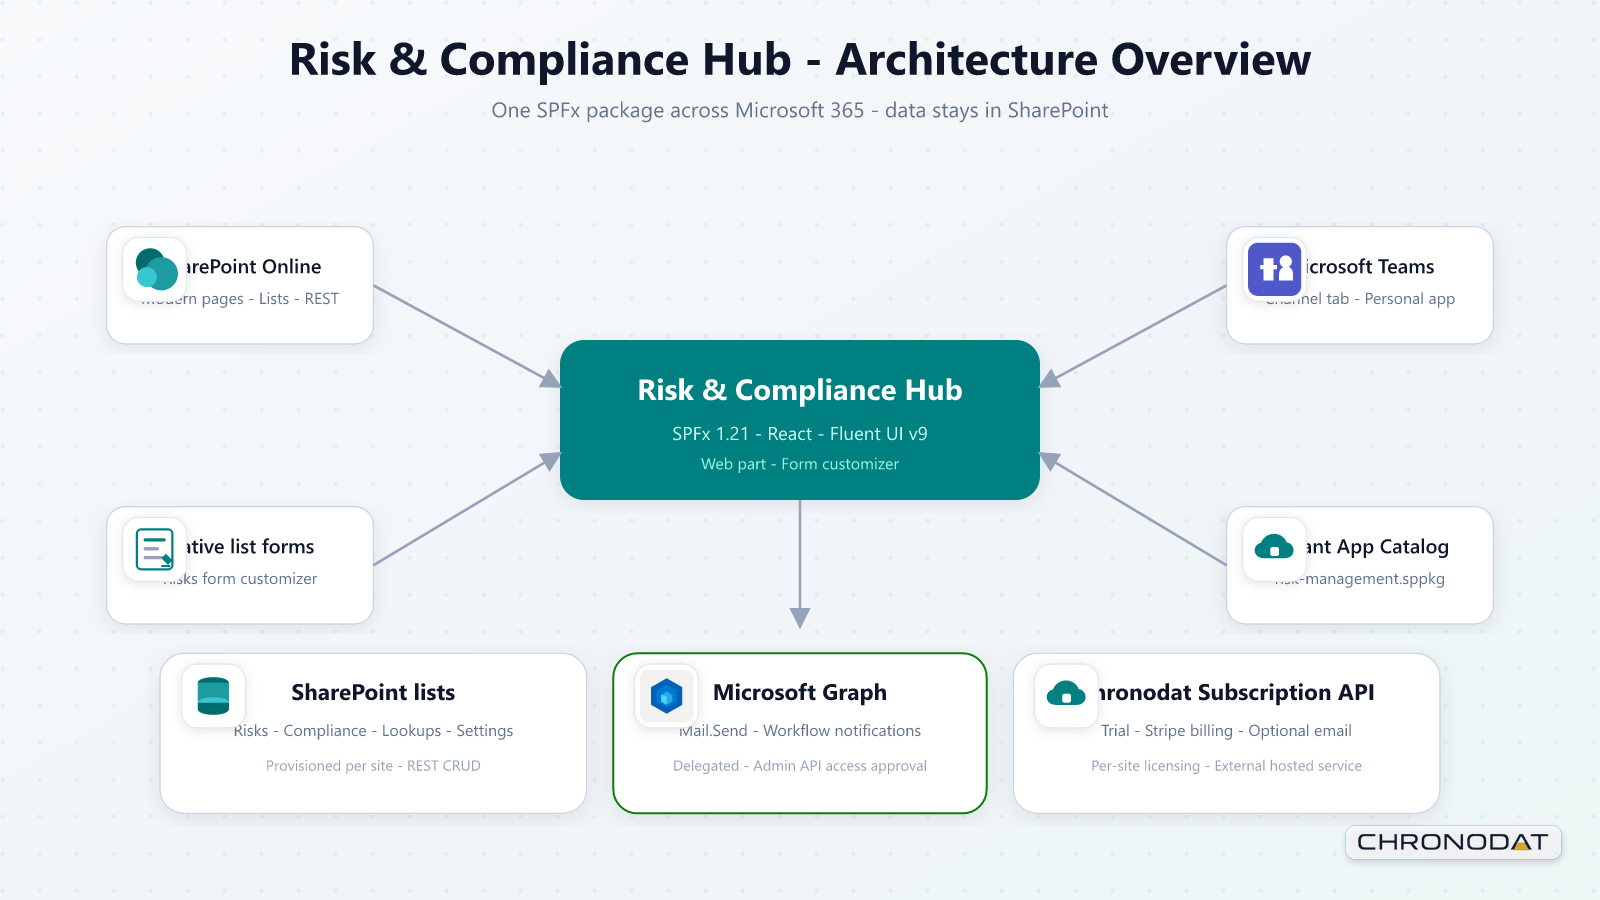
3.1 Create a New Risk
- Click Create New Risk in the top bar (the same button is available on the All Risks page).
- On the General tab, enter the Title and Description, then select Status, Risk Category, Business, Project, and Risk Profile Type as required.
- Switch to the Assessment tab and set Potential Likelihood and Potential Impact; the matrix priority updates automatically in the header. Optionally record residual ratings, causes, consequences, existing controls, and potential cost.
- Switch to the Action Plan tab. Choose a response strategy, enter the mitigation plan, assign owners, and set due dates.
- If the selected Risk Category has a linked form template, complete the additional fields shown below the main tabs (for example, an Environmental Risk form).
- Scroll down to add file attachments if needed.
- Click Save risk. A Risk ID (for example, Risk-001) is assigned automatically from Settings → Numbering.
3.2 View, Edit, and Delete
- From any list or dashboard table, click a risk title to open the detail panel.
- Click Edit to change fields, then Save risk.
- Open the Activity tab on an existing risk to view its SharePoint version history.
- Use row actions → Delete to remove a risk (requires delete permission) and confirm in the dialog.
3.3 List Tools
- Switch between table, list, and card views.
- Search by Risk ID, title, or description.
- Filter by status and matrix priority (Critical, Major, Moderate, Low).
- Apply portfolio filters for business and project.
- Export filtered results to CSV.
- Bulk delete, when you hold delete permission.
3.4 Risk Form Tabs and Supplemental Sections
| Tab / section | Typical content |
|---|---|
| General | Title, description, status, category, sub-category, business, project, profile type |
| Assessment | Likelihood, impact, residual ratings, causes, consequences, controls, potential cost |
| Action Plan | Response strategy, mitigation plan, owners, key dates |
| Category form template | Extra fields shown below the main tabs when Settings → Form Templates links a template to the selected category |
| Attachments | Files linked to the risk item (below the main tabs) |
| Activity | Version history timeline (existing risks only; not shown when creating) |
3.5 Category Form Templates (End User)
- Select a Risk Category on the General tab.
- If an administrator has linked a form template to that category, additional fields appear below the General / Assessment / Action Plan tabs.
- Complete all required template fields before saving.
- Template answers are stored with the risk and appear as custom-field columns in Report Builder.
Administrators create templates under Settings → Form Templates. Each template can include multiple field types (text, dropdown, date, people picker, currency, and more) and optional internal tabs for long forms. See Section 8.2.
3.6 Risk Lifecycle and Workflow Statuses
Each risk moves through organizational statuses (for example Draft, Open, In Progress, Mitigation, Resolved, Closed). Administrators define statuses under Settings → Risk Status & Priority and assign each status to a workflow bucket. Sidebar views group risks by bucket and by due dates.
| Workflow bucket | Sidebar views using it | Typical meaning |
|---|---|---|
| Open | Open | New or acknowledged risks awaiting action |
| In Progress | In Progress | Active treatment or monitoring |
| Mitigation | Custom views, as configured | Controls or actions underway |
| Resolved | Custom views, as configured | Risk treated; awaiting formal closure |
| Closed | Closed | No further action required |
- The Overdue, Due Today, and Due This Week views are driven by action-plan due dates, not by status alone.
- Matrix priority (Critical / Major / Moderate / Low) is separate from workflow status — it reflects Likelihood × Impact.
- Changing status may trigger notification workflows, if configured under Settings → Notification Workflows.
3.7 Attachments and Audit Trail
- On the create or edit panel, scroll to Attachments below the main tabs.
- Click Add files or drag files into the drop zone. Supported types follow SharePoint attachment rules for the Risks list.
- To remove an attachment, use the delete control on the file row before saving.
- After saving, open the Activity tab on an existing risk to view SharePoint version history — who changed what, and when.
Administrators can review changes across the whole application under Settings → Audit Log (Section 8.7).
Additional App Functionality
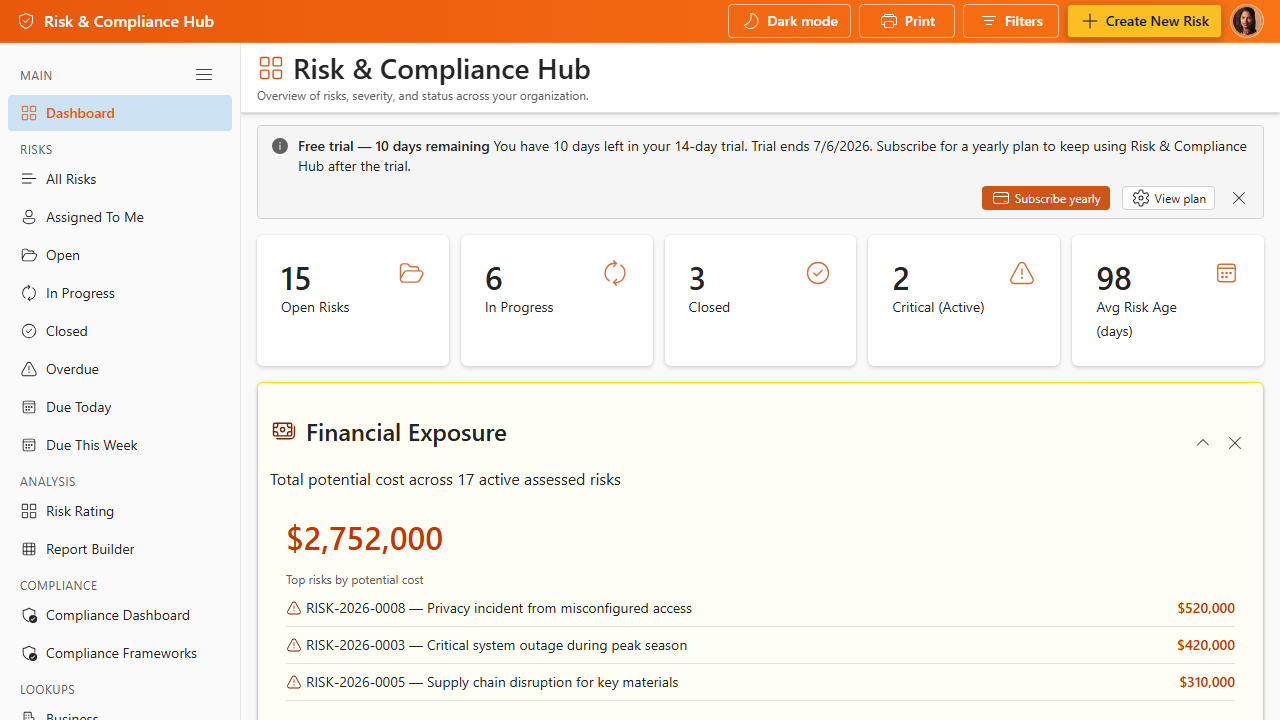
Risk Register Views and Bulk Actions
The All Risks page supports table, list, and card views so teams can switch between dense review, summary scanning, and card-based triage. View preferences are saved for the current browser so repeat users return to their preferred layout.
- Search across risk ID, title, and description, then combine search with status, priority, business, and project filters.
- Use row or card actions to open details, edit, delete, or export the filtered result set.
- Bulk delete is available to users with delete permission. The confirmation step is intentional because deleted SharePoint list items may affect reports and audit history.
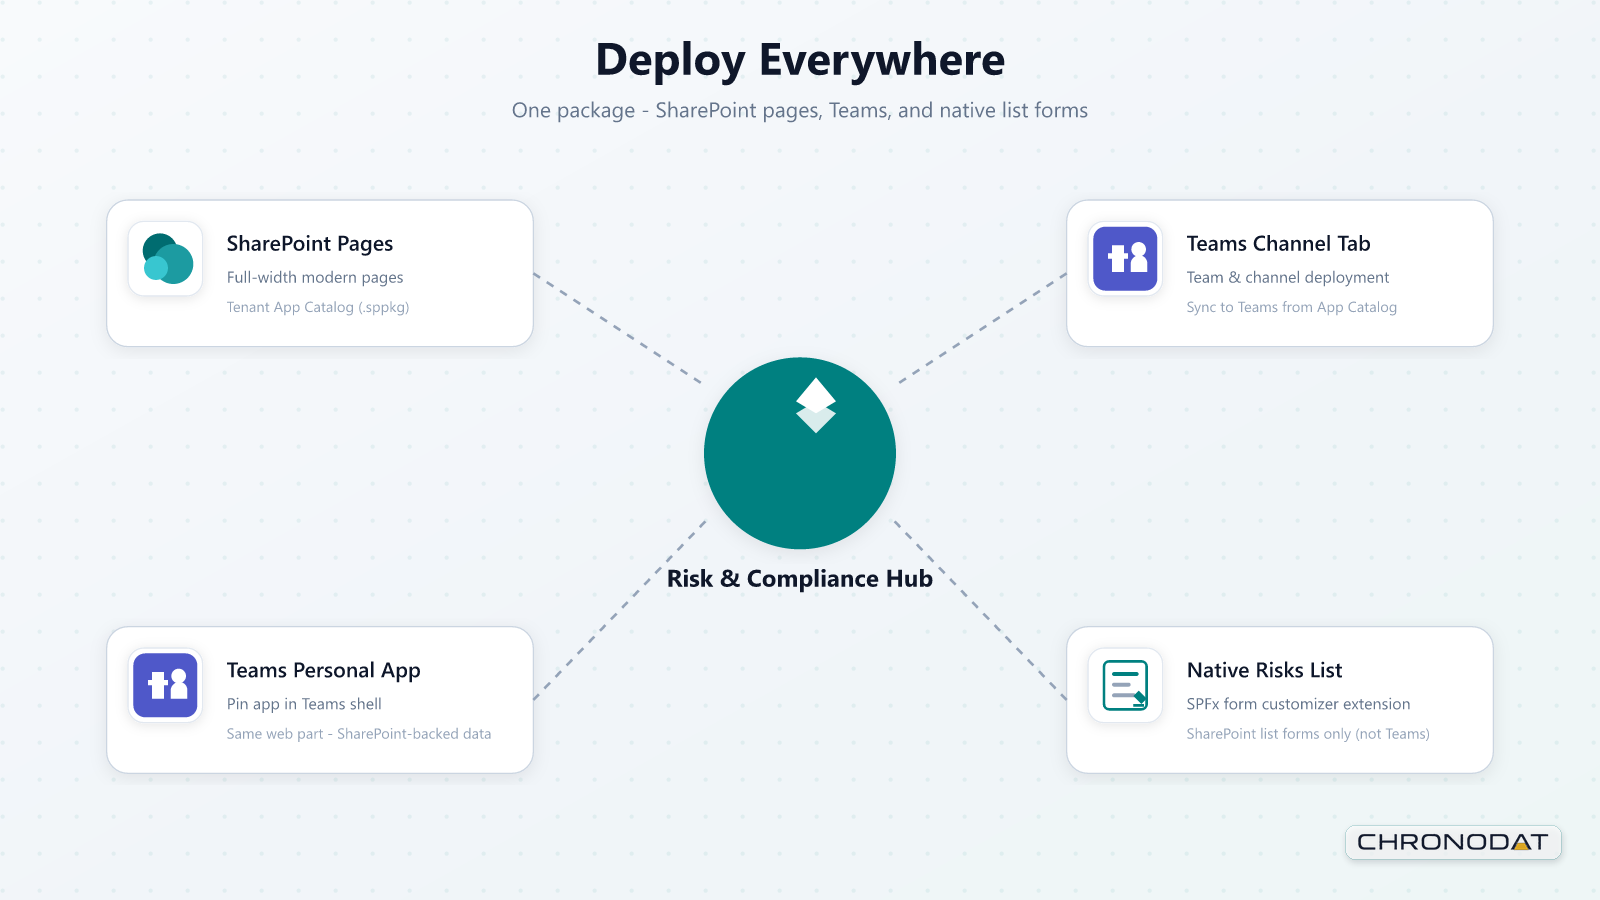
Attachments, Activity, and Native List Forms
Risks can include supporting files such as evidence, photos, spreadsheets, or mitigation plans. Attachments are available in the modern app form and in the native SharePoint list form customizer, so users have a consistent experience from the app, list views, and Teams surfaces.
- Add attachments while creating or editing a risk, then save the risk to persist the files.
- Open an existing risk to download, review, or remove attachments when your permissions allow it.
- Use the Activity tab to inspect SharePoint version history and understand what changed over time.
Custom Risk Fields and Form Layout
Administrators can tailor the risk form beyond the default General, Assessment, and Action Plan tabs. Form settings control visible fields, ordering, required fields, helper text, and optional custom sections used by different risk categories or organizational processes.
When a risk category is linked to a form template, users see additional fields below the main tabs. Those answers remain available to reporting so teams can capture specialized information without creating separate risk lists.