4.1 Create a Work Order
- Click New Work Order in the top bar or on the Work Orders page.
- On General, enter title, description, priority, and service type.
- On Location & Assignment, select Customer and Site.
- Optionally assign a Technician and Scheduled Date.
- Click Save. A work order number (for example WO-2026-0001) is assigned automatically from Settings → Numbering.
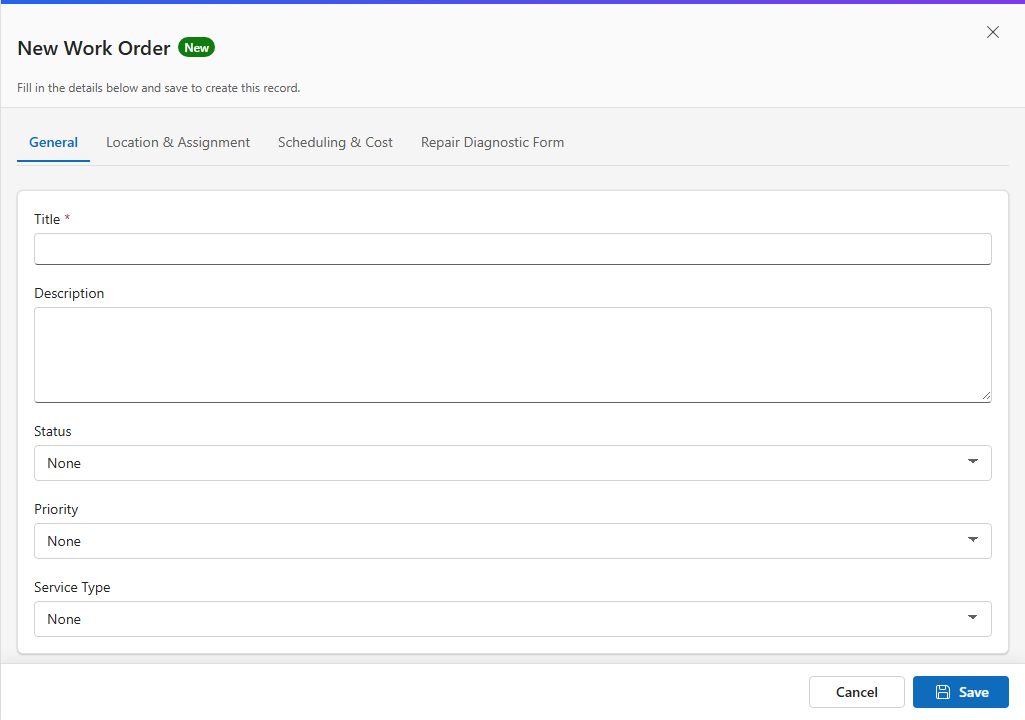
Form Templates and Forms settings tabs control which fields appear and whether they are required.
4.2 Manage the Register
- Search by work order number, title, customer, or technician.
- Filter by status using the dropdown.
- Open a row to view or edit details. Change status inline where supported.
- Delete rows you have permission to remove — confirm in the dialog.
| Status | Meaning |
|---|---|
| New | Job logged, not yet scheduled |
| Scheduled | Date and technician assigned |
| En Route | Technician traveling to site |
| On Site | Work in progress |
| Completed | Job finished |
| Cancelled | Job cancelled |
Custom statuses are configured under Settings → Work Order Status; Scheduler columns group by workflow bucket.
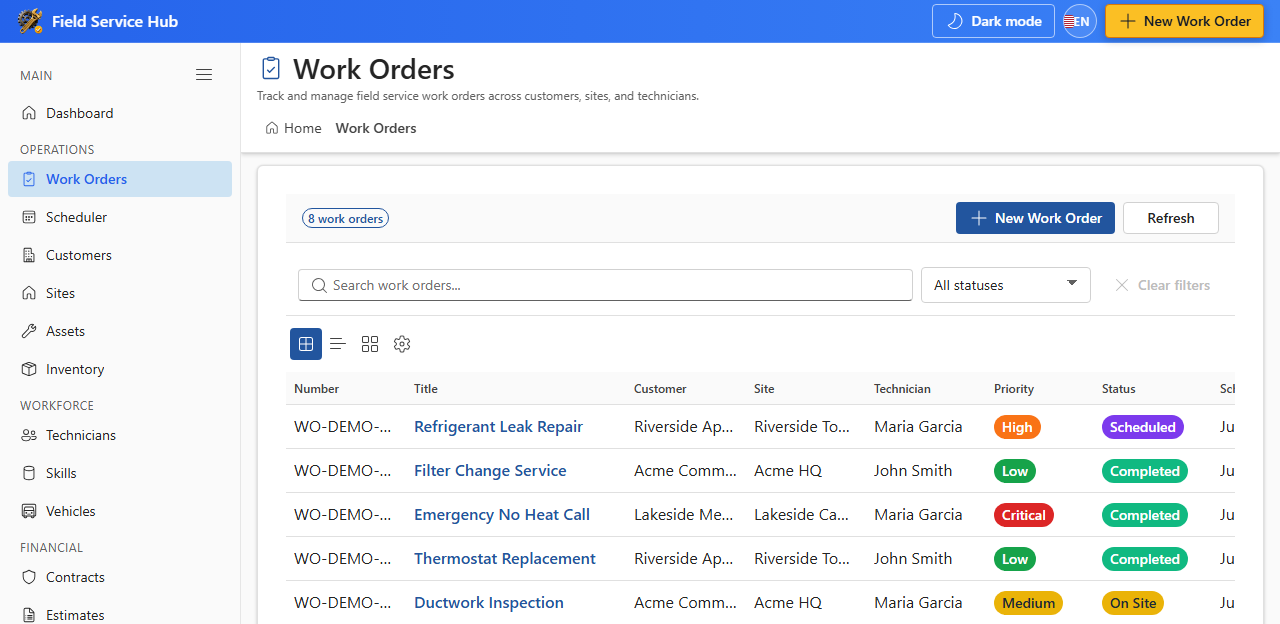
Notification workflows can email customers and technicians when status changes — configure under Settings → Notification Workflows.
4.3 Work Order Detail Panel
- General — title, description, priority, service type, and status.
- Location — customer, site, and linked asset.
- Assignment — technician and scheduled date.
- Activity — SharePoint version history for the record.