1.1 Requirements
- Microsoft 365 SharePoint Online (on-premises SharePoint Server is not supported).
- A modern browser: Microsoft Edge, Google Chrome, Mozilla Firefox, or Safari.
- SharePoint Administrator or Global Administrator role to upload field-service.sppkg to the tenant app catalog.
- Site owner permission on the target site to add the web part and publish pages.
- Recommended: a dedicated subsite (for example /sites/YourSite/FieldService) so 15+ FSM_ lists stay isolated.
1.2 Deploy the App (Tenant Administrator)
- Build or obtain the production package sharepoint/solution/field-service.sppkg (npm run ship in the solution repository).
- Open SharePoint Admin Center → Apps → App Catalog and upload the .sppkg file.
- When prompted, deploy the package and make it available to all sites.
- Optional: Sync to Teams from the app catalog entry for channel tabs.
Approve Mail.Send (optional, for email notifications)
Workflow emails use Microsoft Graph Mail.Send. The app runs without this approval; only outbound notifications require it.
- Deploy the package first so the permission request appears.
- Go to SharePoint Admin Center → Advanced → API access.
- Approve Microsoft Graph → Mail.Send under Pending requests.
1.3 Add the Web Part (Site Owner)
- Create or edit a modern full-width SharePoint page on your target site.
- Click + to add a web part and search for Field Service Hub.
- Publish the page. Users open the app from that SharePoint URL or a Teams tab.
1.4 First-Time Setup
When SharePoint lists have not been provisioned yet, a Complete Setup banner appears. A site owner must run the setup wizard to create 15 FSM_* lists, fields, lookups, and optional seed data. Until setup completes, most features are unavailable.
- Publish the SharePoint page before running setup — the wizard does not run while the page is in edit mode.
- Click Complete Setup and wait until all lists show ready.
- Open Settings → General to set your organization name (for example Field Service Hub).
For the full provisioning checklist and post-setup steps, see Onboarding and Setup Reference in this knowledge base.
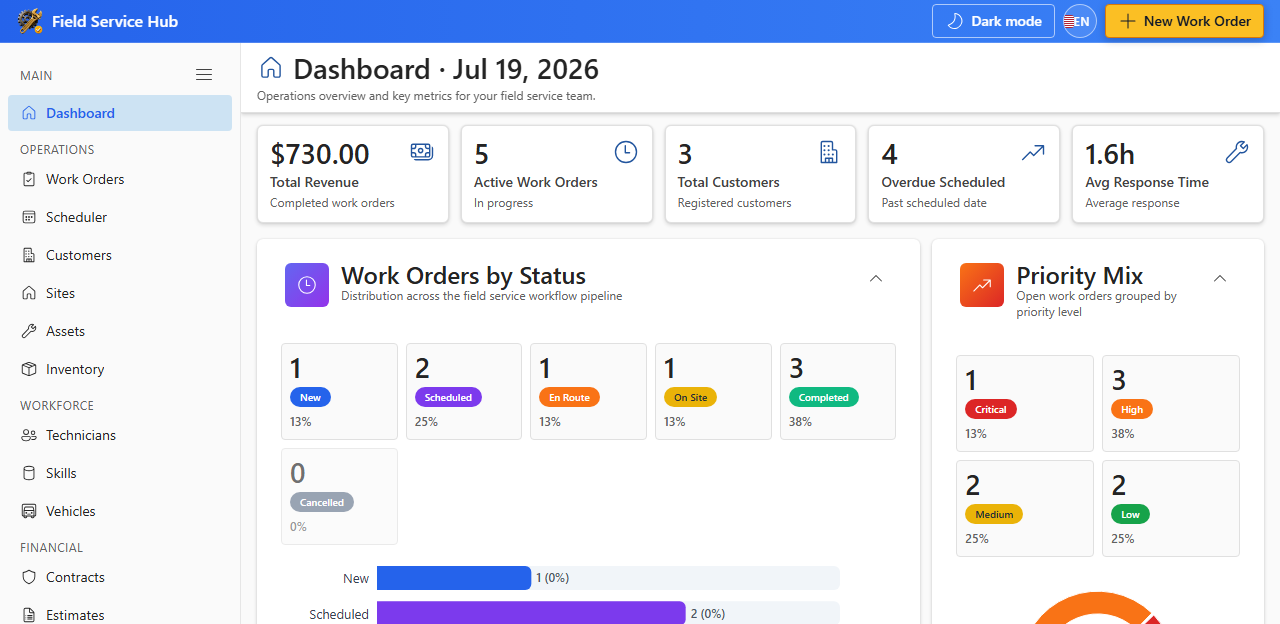
The left sidebar groups navigation into Main, Operations, Workforce, Financial, and Admin. Dismiss the trial notice banner during evaluation if shown.
1.5 Roles at a Glance
| Role | Can do |
|---|---|
| Site owner | Run setup, manage SharePoint list permissions, open Settings |
| App administrator | Configure workflows, templates, numbering, dropdowns |
| Dispatcher | Create work orders, use Scheduler, manage customers |
| Technician | View and update assigned work orders |
| Tenant admin | Deploy package, approve Mail.Send, sync to Teams |
SharePoint list permissions control create, edit, and delete for end users. App administrators control configuration inside the web part only.
1.6 Microsoft Teams
Field Service Hub can run as a Teams channel tab using the same SharePoint site data.
- Deploy and sync the app from the tenant catalog.
- Add Field Service Hub as a tab in a channel.
- Run Complete Setup on the backing SharePoint site — not inside Teams.
- Hide SharePoint chrome is available on SharePoint pages only; it is disabled in Teams.
Additional App Functionality
Subscription, Trial, and Licensing
Field Service Hub includes a 14-day free trial per site collection. Site owners manage licensing from Settings → Subscription.
Licensing is per site collection — not per user seat. If a subscription expires, the app may show a paywall until an administrator renews.